Heroes of Arkesia,
The July Update releases next week, on July 12, bringing Inferno Kakul-Saydon, the Elgacia Epilogue quests, the Music Box of Memories, the Maharaka Festival, QoL improvements, and more! The full release notes will drop next week.
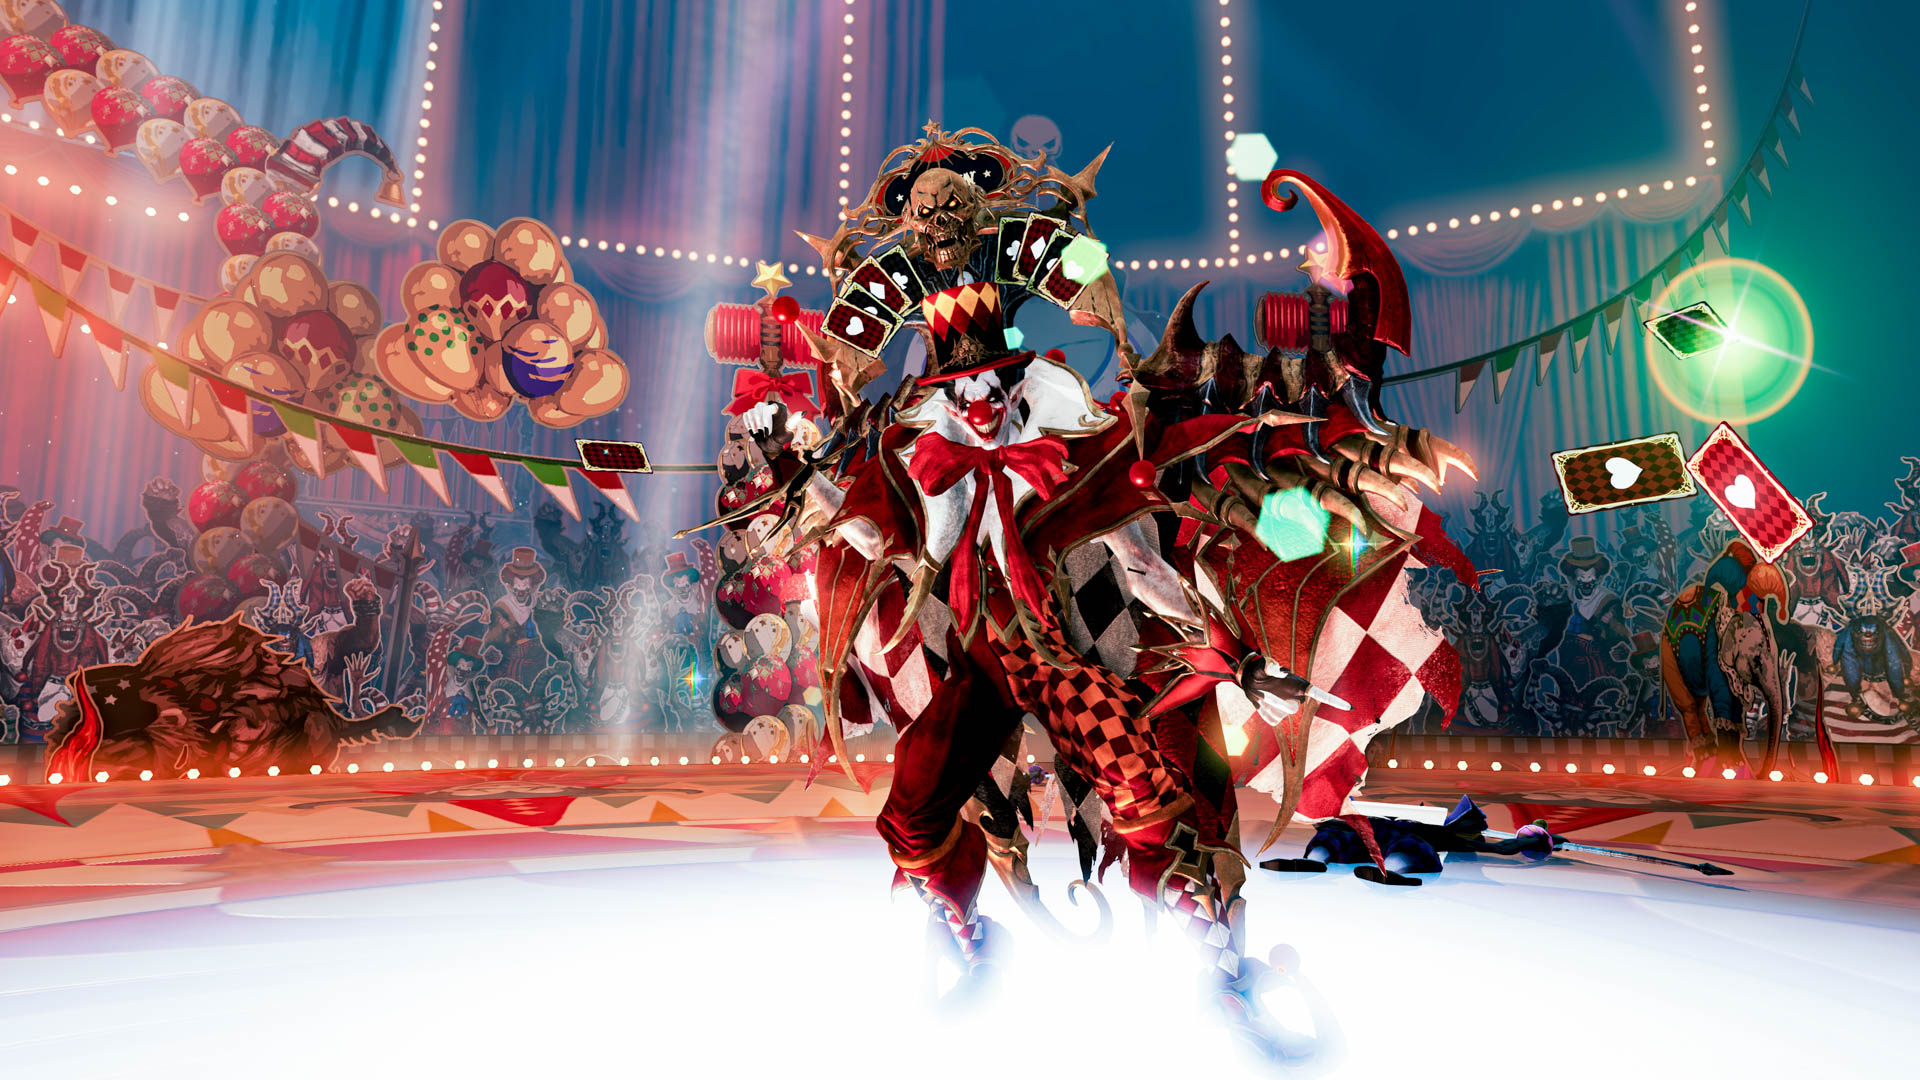
Prepare for Inferno Kakul-Saydon
While Legion Raids prove to be a challenging experience for many— Inferno takes it to the next level. It’s all about proving you’re the among the best of the best in Arkesia and earning the accompanying prestige. Inferno Kakul-Saydon will require Item Level 1475 or higher to participate, along with a build created in the Book of Coordination.
Below you’ll find tips and tricks from Lost Ark legend Saintone on preparing for the raid and adapting to some of the new challenges that the Inferno difficulty weaves into the encounter. Along with the tips, Saintone welcomes all interested raiders to the Hell Academy Discord, a place for Inferno mode enthusiasts to learn more about the fights, builds for classes, and find other raiders.
Inferno Kakul-Saydon Tips and Tricks ft. Saintone


Hello! With the Inferno Kakul-Saydon Legion Raid arriving soon, I wanted to share my thoughts on my personal favorite Inferno mode in Lost Ark. Inferno Kakul is actually the one that I recommend for all people to start out with. Is it because of the difficulty?
No!
It's because the very nature of it being a 4-player raid lends to it being a lot more fun than previous encounters. In a 4-player setting, not only is it easier to quickly organize a group, but on top of that, personal responsibility and general involvement of the player is a lot higher when you make up a quarter of the entire party (for example it's easier to get involved in voice comms). Just look at how many more people enjoy Kayangel over Brelshaza!
Intro & Gate 1
Generally, I'd say that the overall difficulty of the battle isn't that much higher than Inferno Vykas, so if you've cleared that, you can definitely clear this. The DPS checks are more lenient than Vykas, but each player is responsible for a bigger portion. In terms of difficulty, the first gate is very easy, the second gate can be a bit challenging, and the last gate is moderately hard.
Each gate offers a few extra mechanics over the non-Inferno versions. Take time to figure out how you want to assign positions to deal with them ahead of time, especially mechanics like the new two-pair pattern in Gate 1. Most parties that I played with had some small deviations on how they handled this, but it ultimately boils down to quickly communicating which two suits you're looking for.
Gate 2


In gate two, a few lethal patterns that knock you off the board no longer have telegraphs, so you need to cautiously attack the boss while looking out for them. In some cases, 'unfair' overlaps can occur where the solution to survive is not obvious. As this gate also has a very lenient DPS check, I would strongly recommend you bring a Time Stop Potion until you become acclimated with attacking and observing at the same time (kind of like playing the game while cross-eyed). For Entropy users, this fight is arguably one of the hardest battles in the entire game, but even if your uptime ends up being lower than usual, you should still be able to clear with comfort.
If you want even more time to clear this, I would also recommend that if you haven't already, you learn techniques that allow you to find which card Kakul is hiding under when Saydon is slamming the hammer down on the table. All classes can universally do this by applying Bleed before he disappears and listening for the proximity of the sound effect, but certain classes can also find him easily with their skills, such as Sharpshooter's Atomic Arrow.
The little clown has additional patterns which normally don't knock you off in Normal mode but will knock you off the table in Inferno mode, so make sure to respect them. The tracking laser can be mitigated with paralysis immunity and the horn is pretty easy to dodge.
Lastly, the pizza mech (which is often skipped in non-Hell mode) can be really tricky due to the flipped controls on random players. Sometimes the game won't immediately register that your controls are backwards, so check your debuff bar and if you have it, try to move around a little bit before the mech starts so it registers properly.
Gate 3


The last gate is definitely the trickiest. Most of it should be common sense, but there's a few things to know. First, the order of difficulty of the platform mini-games is reversed. So in Normal mode, the difficulty order is 3, 4, 2, 1. In Hell mode, it's 1, 2, 4, 3. So if you're confident in your abilities, make sure to assign accordingly. Just know that the person doing the first platform game will get the most practice due to wipes.
Depending on your ability, you will get conversion stack mechanic at least twice, increasing the bosses' final damage considerably. This mechanic is timed, so you'll always experience it roughly around the same time each time (depending on speed for example, you can see it right before showtime or right after showtime).
My last tip for this gate is to be very conservative with your potions. It can be tempting to chug a potion when you're within lethal range of his attacks, but the worst thing that can happen is you drink a potion and then are immediately met with a reverse HP curse. This mechanic is also predictable, so you should wait and see if you're targeted with a curse before you decide to pot up.
Oh, and about bingo, don't play too passively. The boss does really high damage during bingo, and certain attacks can be close to lethal even from high HP. They aren't difficult to avoid, but if you take too long, the amount of space to dodge them can shrink a lot. A good support with solid shielding is vital here. Be concise with shotcalling where to place the bombs and have back-up plans to deal with the higher frequency of hammers to avoid screwing yourself over. If you do bingo well while maintaining your damage, he'll be dead by the third detonation, with plenty of space left on the board. Even if you mess up and die, your party members can finish the gate through additional detonations, as long as you don't flip the golden tile (which drops a mega bomb on the field that wipes the raid shortly afterwards).
Stay tuned for the full release notes next week. In the meantime, we’ll see you in Arkesia!